Rice wine, also known as mijiu, is an alcoholic drink made from sticky rice, traditionally consumed in East and Southeast Asia, and also South Asia. Rice wine is made from the fermentation of rice starch that has been converted to sugars, which in turn produces alcohol. Microbes are the source of the enzymes that convert
the starches to sugar.
Rice wine typically has an alcohol content of 18%–25% ABV.
Rice wines are used in Asian gastronomy at formal dinners
and banquets, but many types are used in cooking.
They are also used in a religious and ceremonial context.
Best known rice wine types are Japanese mirin, mageolli a milky traditional wine from Korea, and of course Japanese sake. Sake is the most widely known type of rice wine in North America because of its ubiquitous appearance in Japanese restaurants.
There are many other types of wines produced from rice with each country and area having it’s own style of wine. Many types come from China and lesser known traditional styles are from Korea, Philippines, India, and smaller tribes from Asia.
We offer three types of rice wine starter kits. Easy to make and enjoy for the holidays. Most starters make 1L of wine and takes about a week to produce. Happy Brewing!
Looking for a new way to ferment vegetables?
Something quick and easy to make fermented pickles that are a great condiment to any meal. A Nuka bed offers a way to get lactobacillus bacteria and wild yeast, without having to vent
or clean up exploding glass jars!
It makes a great RAW, fermented/cultured, and vegan condiment.
What is a Nuka ‘Bed’?
Nukazuke (糠漬け) are a type of Japanese pickle, made by fermenting vegetables in rice bran (nuka). Almost any edible vegetable may be pickled through this technique, though traditional varieties will include eggplant, Japanese radish (daikon), cabbage, and cucumber. The taste of nuka pickles can vary from pleasantly tangy to very sour, salty and pungent. These pickles also retain their crispness which adds to their popularity.
Fish nukazuke is also common in the northern part of Japan.
Sardines, mackerel, and Japanese horse mackerel are frequently used. Some people pickle meat in nuka-bed, too.
If pickling meats, use a separate nuka bed and not the bed for vegetables.
The nuka-bed is traditionally kept in a wooden crock but ceramic crocks or even plastic buckets are also common. Many Japanese households have their own nukazuke crocks which are faithfully stirred by hand every day. Due to varying methods and recipes, flavors vary considerably, not only from region to region, but also from household to household.
Pickles (tsukemono) are an important staple of Japanese cuisine, and nukazuke are one of the most popular kinds. They are often eaten at the end of a meal and are said to aid in digestion. The lactobacillus in nukazuke pickles may be a beneficial supplement to the intestinal flora. They are also high in vitamin B1.
How to Make Your Own Nukazuke Pickle Bed
RAW – Vegan – Gluten Free
Japanese Pickles Ready to Eat
Needed Ingredients…
– Rice Bran, no-GMO and/or organic – 20 oz
– Kombu Seaweed – one leaf, cut into very small pieces
– Sea Salt – 1/4 cup or to taste
– Korean Chili Flakes – 1/8th to 1/4 tsp
– Dried Citrus Peel – 2 tbsp
– Dried Bonito Flakes – 1/8 to 1/4 cup – Optional – Fresh lemon or lime juice – enough to cover top of nuka bed – Condiments or veggies of your choice – Keep whole – Also, for a new starter bed add some fresh fruit like apples
– A fermenting vessel – lead free
Directions…
Note: It needs to be stored under refrigeration after opening to avoid mold. Storage term: 12 month (This usable time is only a guide. If you stir well NUKA-BED with your hand once every 2-3 days, add extra NUKA rice bran and salt as necessary, it can be used semi-permanently.)
If you are using the nuka kit purchased from us, you will receive two packets. The larger pack is the rice bran and flavorings. The smaller packet is the Nuka starter with fresh sliced fruit.
1. Start by opening the large packet or mixing the above ingredients together and adding enough filtered water (no city tap water please) to make a thick paste. Add the water in small amounts until the correct thickness is obtained. The bed should be like a thick paste.
Over time, the addition of the vegetables will add water to the mixture and more fresh rice bran and salt will be needed.
2. Now add the small packet that contains the nuka starter and fresh fruits. If making your own nuka bed, add some slices of fresh cut organic or wild apples (this adds wild yeast and wanted bacteria).
Mix in the nuka starter by hand until well blended. Also, when starting a new nuka bed from scratch, it will take time for the bacteria and yeast to grow through the bed and become 100% active. The lemon juice will help with retarding mold growth. Note: It is important to mix the bed by hand to spread wanted bacteria within the bed mixture.
3. Add the vegetables that you wish to pickle. Common choices are roots like burdock and carrots, small eggplant, Japanese radish (daikon), cabbage, and cucumber. We like doing radishes and cucumber!
Rub the vegetables with sea salt then place into the nuka vessel pushing them down to cover with the rice bran mixture. Sprinkle the top of the bed with the lemon juice and more salt.
4. Allow the vegetables to sit in the nuka bed for 3 to 5 days. Culturing time may vary depending on the vegetables used and temperature. The taste will move from tangy to very sour the longer the pickles set in the nuka. Do not ferment at room temperature during the hot summer months or the bed may become contaminated with molds.
Daily Hand Mixing nuka bed
Mix by hand each day making sure to replace the vegetables under the rice bran. Salt may be sprinkled over the top to help retard mold growth, too. Once complete and to your liking remove the nuka pickles, slice, and serve. Start a new batch or place fermenting vessel in the refrigerator keeping it mixed to prevent mold growth.
Enjoy this method of making great quick pickles without the mess of multiple jars, airlocks, weights, and other unnecessary items. The taste and flavor of the cultured nuka vegetables is second to none! If you want a premixed nuka bed, we have them available in traditional or vegan, at our web store – store.organic-cultures.com
Nattō (なっとう or 納豆?) is a traditional Japanese food made from soybeans fermented with Bacillus subtilis var. natto. Some eat it as a breakfast food. Nattō may be an acquired taste because of its powerful smell, strong flavor, and slimy texture. In Japan, nattō is most popular in the eastern regions, including Kantō, Tōhoku, and Hokkaido.
Before Making NATTO:
Be sure the entire processing area is cleaned for production. Make sure all utensils, pots, cheesecloth (FUKIN), etc. are as sterile as possible. (Boil utensils for 5 minutes prior to using.)
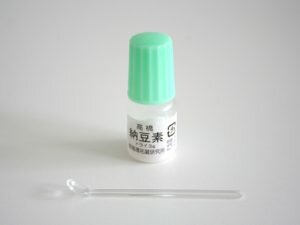
The packet of NATTO spores comes with a special small spoon; be sure to use the small spoon to measure the appropriate quantity for the recipe.
The fermentation process requires the NATTO be kept at approximately 100°F (37°C) degrees for 24 hours. Ovens with a low temperature setting can be used, an oven w/ light on only, or inoculate in large cube-shaped food dehydrators.
NATTO is quite odorous while fermenting, and you may want to isolate the fermenting NATTO during this time.
Ingredients and Supplies needed for Making NATTO:
2 pounds (900g) soybeans (about 4 cups)
10cc water, boiled for 5 to 10 minutes to sterilize
One spoonful (0.1 g.) NATTO-kin spores (use the special spoon that came with the packet)
Cheesecloth or butter muslin (FUKIN in Japanese)
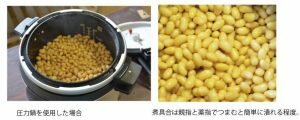
Non-reactive pot (i.e., stainless steel, enameled, ceramics, etc.) or Pressure cooker
Large stainless steel, wood, or plastic spoon or spatula
3-4 oven-proof glass containers with lids
Instructions for Making NATTO:
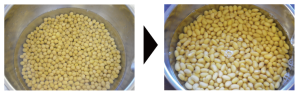
– Wash the soybeans using running water to gets rid of tiny dirt or dead skins off the beans.
Washing the Soaked Soy Beans
– Soak with clean water for 9 to 12 hours (longer soaking time recommended during colder months). Be sure to use approximately 3 parts water and 1 part soybeans to allow for expansion. You will end up with 8 to 12 cups of beans.
Draining Soy Bean for Steaming/Boiling
Drain the beans from the soaking water. Place beans in a large pot with mesh bowl and pour in water. Steam it for 3-4 hours. Or fill with water and boil 5-6 hours. The recommended way is to use a “Pressure cooker”, that can be cooked faster than in a normal pot. Please refer to the pressure cooker instruction manual for operation guidelines.
Steaming Soy Beans for Natto-Kin
– Drain the cooked beans and place in a sterilized pot. Dissolve 1/5 special spoonful of NATTO spores (0.1g) into 10cc of sterilized water (or mix by package directions).
Types of Natto Spores From Japan
– Immediately pour the NATTO spore solution over the beans while the beans are still warm but not hot to the touch. Stir the beans and water mixture together carefully using a sterilized spoon/spatula.
Inoculation With Natto Spores
– Place a thin layer of beans in each of the 3 to 4 containers. If at any point during the process some beans are spilled on the counter, etc., discard the spilled beans as they can contaminate the other beans if added back in to the batch.
Natto Being Packed into Serving Trays
Place the sterilized cheese cloth over the top of the containers and place the tight-fitting lid over the cheese cloth. Preheat the oven, dehydrator, or KOTATSU Japanese Warmer to 100°F (37°C). Place the covered containers in the oven, dehydrator, or warmer and allow the NATTO to ferment for 24 hours being sure to keep the temperature steady at 100°F (37°C). Check the temperature throughout the day/night.
Inoculation Time !
At the conclusion of the fermentation period, let the NATTO cool for a couple of hours, then remove the lid and the cloth, replace the lid, and store the containers in the refrigerator at least overnight.
NATTO can also be aged in the refrigerator for 3-4 days. Smaller portions of finished NATTO can be stored in the freezer and thawed for later use.
Ready to Eat…YUM!
Need Natto spores fresh from Japan? We have them in our store with many other types of food culturing spores:
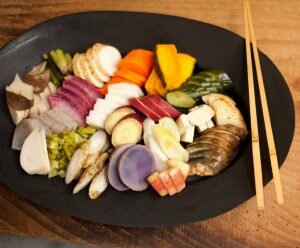
These condiment sides are a great way to enhance a meal or dish. Very easy to make and uses only a few ingredients. The Japanese use many of these condiment sides every day and most contain minerals and micro-nutrients that normal
salt and pepper cannot compare.
Seaweed Furikake (Nori Fumi Furikake)
In Japan, Furikake is a popular table seasoning that comes in a variety of flavors.
Nori fumi furikake, meaning seaweed flavored furikake, is a very popular flavor, and for good reason! It’s a classic combination used on plain rice, for a cheap meal. Just a sprinkle gives the perfect boost of flavor for rice, noodles, soup, or other dishes!
How to use furikake besides adding to white rice? Try using Japanese furikake with any recipe that calls for shredded nori on top.
Ingredients…
1/4 cup white sesame seeds
1/4 cup black sesame seeds
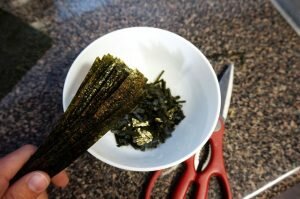
2 sheets nori seaweed
1 teaspoon sea salt
1 teaspoon sugar
Directions…
– Start by grinding the black and white sesame seeds. Add the sea salt and sugar, grind until texture is correct.
– Next, toast the nori over an open flame for a few seconds, if not already toasted.
Cut nori sheet into long thin strips. Now layer several strips and fold over 2 or 3 times. Cut the folded nori into very tiny strips. For better looks, cut the nori into very small pieces vs. grinding/blending them up.
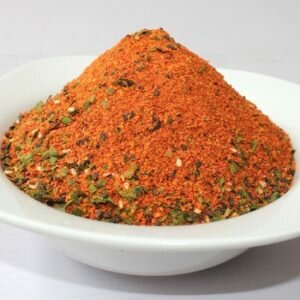
Shichimi Togarashi, Japanese Seven Spice
Shichimi Togarashi
With the expanding appreciation of Japanese cuisine here in this country, there is a need to incorporate the seasonings needed to create and enhance them as well. This seasoning is popular in Japan and used to add both heat and flavor to dishes such as soba noodles, udon, beef tataki, jasmine rice. The heat of this seasoning, unknown in most Japanese cuisine, is just a little. So there is just a hint. Hand mixed from orange peel, black, white and toasted sesame seeds, cayenne, ginger, Szechwan pepper and nori.
Ingredients…
1/8 c – Orange/tangerine peel, dried
1/8 c – Black sesame seeds
½ c – Toasted white sesame seeds(dehulled)
– Toasted nori – 2 sheets
– Japan or Korean chili, to taste
– 1/8 or 1/2 teaspoon – Dried ginger root
– Szechwan pepper, to taste
– Optional, one may add hemp seeds and shiso to the mix
Directions…
Start by grinding the orange peel, black/white sesame seeds, ginger, pepper, and chilies.
Once your happy with the grind and flavor, next is to add the nori sheets
Toast the nori over an open flame for a few seconds, if not already toasted.
Cut nori sheet into long thin strips. Now layer several strips and fold over 2 or 3 times. Cut the folded nori into very tiny strips. For better looks, cut the nori into very small pieces vs. grinding/blending them up.
Yukari Shiso Salt – Yaki Onigiri
This is very easy and no recipe is really needed… Ingredients…
– Shiso leaf, dried, ground
– High quality sea salt, ground
Directions…
Mix 1/3c shiso leaf with 2/3c sea salt
Place in sealed container for long term storage
Dashi
Not really a condiment as it is used as a base, to build other flavors from. Used in many traditional Japanese dishes for that great added layer of flavor, called umami. Simple to make, but it adds a lot of flavor to a dish. Vegans and veggies can just make a seaweed and veggie dashi vs. using the bonito flakes.
Ingredients…
– 2 (4-inch) square pieces kombu – 2 1/2 quarts water – 1/2-ounce bonito flakes or katsuobushi, about 2 cups
Note: For vegans make a vegetable broth w/ carrots, onions, seaweeds, garlic, and shiitake mushrooms
Directions…
Put the kombu in a 4-quart saucepan, cover with the water and soak for 30 minutes.
Set the saucepan over medium heat until the water reaches 150 to 160 degrees F and small bubbles appear around the sides of the pan, 9 to 10 minutes.
Remove the kombu from the pan. Increase the heat to high and bring to a boil, 5 to 6 minutes. Reduce the heat to low and add the bonito flakes. Simmer gently, stirring frequently, for 10 minutes.
Strain the liquid through a fine mesh strainer lined with muslin or several layers of cheesecloth. Reserve the bonito flakes for another use.
For long term storage, place in an airtight container in the refrigerator. Use within 1 week or freeze for up to a month.
Gari – Pickled Ginger
Mostly known for its use as a condiment in sushi dishes, it has a great sweet zingy taste.
So easy to make and will last under refrigeration for a long time.
Ingredients…
6 ounces fresh ginger ¼ cup plus 1 Tbsp sugar 1 Tbsp sea salt 6 Tbsp plain unseasoned rice wine vinegar
Directions…
– Peel ginger and slice very thin, almost see through.
– Put ginger in a bowl with
– ¼ c of sugar and 1 Tbsp salt and mix together and let sit for 30 minutes.
– Boil enough water in a pot to cover the amount of ginger and cook the now marinated ginger slices in it for 45 seconds and drain through a strainer.
– Put hot ginger slices in a jar.
– Boil the rice vinegar and sugar together and pour over the ginger.
– Let sit out on the counter for 24 hours.
– Place jars into the refrigerator and leave at least 1 week before tasting. Taste will improve with time; a month in the fridge does well. It will keep well for 6 months.
We hope you have enjoyed learning some new recipes that will make any meal tastier no matter if you’re a vegan, veggie, or meat eater.
Many of the items can be fermented, if one likes, or ingredients can be cultured, too
Here’s part two of our Blog on Tsukemono
type pickles from Japan.
These are great for eating plain or a side dish,
a condiment, or mixed with plain rice!
Listed below are recipes that have been modified from the traditional form for the USA consumer as some ingredients are hard to find. What is Tsukemono?
Tsukemono (漬物?, literally “pickled things”) are Japanese style preserved vegetables (usually pickled in salt, brine, or a bed of nuka rice bran). Many are served with rice as an okazu (side dish), with drinks as an otsumami (snack), as an accompaniment to or garnish for meals, and as a course in the kaiseki portion of a Japanese tea ceremony.
Type
Kanji
Pickling Ingredient
Shiozuke
塩漬け
salt
Suzuke
酢漬け
vinegar
Amasuzuke
甘酢漬け
sugar and vinegar
Misozuke
味噌漬け
miso
Shoyuzuke
醤油漬け
soy sauce
Kasuzuke
粕漬け
sake kasu (sake lees)
Koji
塩麹
malted rice
Nukazuke
糠漬け
rice bran
Karashizuke
からし漬け
hot mustard
Satozuke
砂糖漬け
sugar
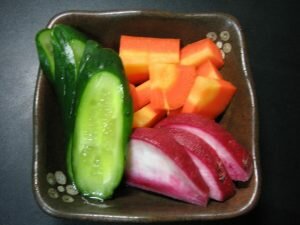
Today we’ll look at some new recipes that you can make at home. Place in the refrigerator and they can last for weeks…
Shibadsuke –
Sliced cucumber and tree ear mushroom salted and pickled with red shiso.
To make yourself, use any hearty mushroom that will hold it’s shape.
– Start by cutting fresh cucumber in half, removing the seeds and skin, then cut into thin strips.
– Soak the mushrooms, if dried, in enough water to cover. Once soft cut into thin strips. We used shiitake mushrooms.
– Bring the required amount(dependent on batch size) of rice wine vinegar to a boil, remove from heat, and add the shiso leaf and mushrooms. Allow to simmer until colour turns red and taste develops. If you don’t have shiso leaf try a Japanese shop or grow your own. You may be able to find the leaf already pickled, too.
– Remove from heat and add the cucumber slices. Mix together.
Add sea salt to taste. Allow mixture to set covered with vinegar at room temperature for 3 to 5 days. Then pack into jars and keep in refrigerator. Will keep for a month or more if kept cold and under brine. Hint: Add a little extra vinegar if liquid is not enough.
Here’s a photo of our results…
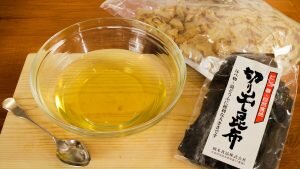
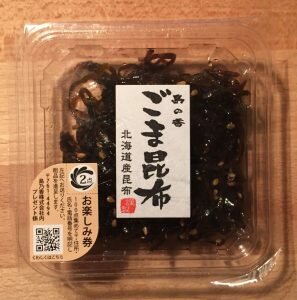
Sesame & Kombu –
Strip of kombu vegetable is cooked with sugar and soy sauce with bonito dashi. This is one of our favorites hands down. The saltiness of the sea combined with sweet sugar and rich soy sauce!
This Japanese quick pickle is easy to make…
– Start by washing the kombu and soaking until soft.
– With the kombu soaking, make a dashi broth by bringing the amount of water needed to a boil. Once water boils, remove from heat and add bonito flakes (a type of dried fish, shaved very thin). For good flavor you’ll want about a 1/2oz per 4 cups water. Once flakes the are steeped, strain liquid to remove the flakes. We like to eat the fish flakes, so they don’t have to be removed.
– Cut the kombu into thin strips
– Place the cut kombu into the broth and add sugar and soy sauce to taste.
– Allow to simmer until liquid concentrates then add the sesame seeds at the end. Adjust sugar and soy as needed, to taste.
Allow mixture to set covered with vinegar at room temperature for 3 to 5 days. Then pack into jars and keep in refrigerator. Will keep for a month or more if kept cold and under brine.
Here’s a photo of our results…
Ginger & Kombu –
Strip of kombu is cooked with sugar and soy sauce with bonito dashi.
Hint of ginger taste.
The same as making the sesame and kombu recipe but with the use of ginger root verse sesame seeds.
– Start by washing the kombu and soaking until soft.
– With the kombu soaking, make a dashi broth by bringing the amount of water needed to a boil. Once water boils, remove from heat and add bonito flakes(a type of dried fish, shaved very thin). For good flavor you’ll want about a 1/2oz per 4 cups water. Once flakes the are steeped, strain liquid to remove the flakes. We like to eat the fish flakes, so they don’t have to be removed.
– Cut the kombu into thin strips
– Place the cut kombu into the broth and add sugar, sliced or grated ginger and soy sauce to taste. Note: ginger root is strong to taste so not much is needed.
– Allow to simmer until liquid concentrates. Adjust sugar and soy as needed, to taste.
Allow mixture to set covered with vinegar at room temperature for 3 to 5 days. Then pack into jars and keep in refrigerator. Will keep for a month or more if kept cold and under brine.
Fuki Sansho –
Fuki is a kind of edible wild plant in mountain side in Japan.
Picked in Yamagata or Akita prefecture, north part of Japan.
Simmered in sweet sugar and soy sauce.
A hint of Japanese pepper tree seed.
This one we have not tried, but it could work with many plants.
The method is the same to simmer the plant in sugar and soy sauce.
The recipe is finished with a hint of strong pepper, like schezwan pepper.
Experiment with this one and see how it goes!
Pickled Garlic – Three Great Recipes for Japanese Garlic Tsukemono
In our quest to provide you with culturing recipes to use with your ferments, we have three great uses for garlic in the Tsukemono Japanese style. All the recipes are easy to make and provides the healing properties of garlic. Try a small batch of each to see which ones you like best! Recipes from the book: Tsukemono – Japanese Pickling Recipes by Ikuko Hisamatsu
Garlic in Miso – Ninniku Miso-zuke
This reminds me of the ‘stamina’ soups we would get at little Japanese shops in Tokyo and Atsugi (厚木市, Atsugi-shi is a city located in central Kanagawa Prefecture)
Known to be the ‘stamina builder’, which is used as an appetizer, condiment, or pickle. Just a little goes a long way. The strong garlic smell will reduce in time of about a month or more. The miso will preserve the garlic for long-term storage.
What is Needed:
– 9 oz of fresh garlic
– 9 oz of aged miso (We suggest using a dark miso, however, any miso will work) Make sure to use an unpasteurized miso.
– 3 to 4 tbsp mirin (or a sweetener if you cannot find mirin)
Directions:
1. Start by separating the cloves of garlic, trim off the roots and outer skin. Make sure to remove the thin membrane under the outer skin.
2. Bring a pot of water to a boil and add the garlic. Briefly blanch the cloves, remove from pot, and drain.
3. Pat the garlic dry, being careful not the break or damage the cloves.
4. Combine the miso paste and mirin.
5. Place a layer of miso in the bottom of the packing jar. Add cloves and cover with more miso. Keep adding layers of miso and garlic. Top off the packing jar with a layer of miso. Make sure no garlic is exposed. You can also add a layer of salt at this time, which will help keep mold from forming.
6. Seal the packing jar or container and allow to sit in a cool place for a month or more. Store the container in the refrigerator during the summer months or in hotter locations.
Japanese eggplant with garlic miso paste
Once ready for use, the cloves can be either eaten by themselves or added to other dishes. Use a light miso for a sweeter batch and a dark or brown miso for stronger taste. Try making a little of both and see which is liked best. Makes a great garnish for barbecued meat dishes. Also, nice to thinly slice and add to stir-fries or to season plane rice. Enjoy
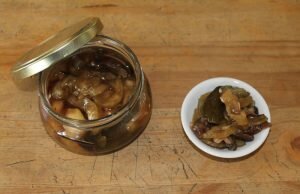
Garlic Honey – Ninniku Hachimitsu-zuke
This is a great cultured ferment for the winter season! Easy to make and loaded with cold and flu fighting properties. We recommend using RAW honey for the best taste and beneficial remedies. The honey is ready in as little as 2 to 3 days. Wait around a month or more to eat the garlic cloves. The garlic will start to break down if left to sit to long, best to make smaller batches to use within a month or two.
The honey gives a nice sweet garlic flavor for many dishes. Or if your a garlic fan you can eat the cloves, like candy.
The garlic infused honey, when thinned down with water, makes a great hot or cold drink to enjoy or as a cold remedy! One can find many benefits to using this recipe for health and well being.
Garlic steeped in raw honey
What is Needed:
– 10 oz (300g) Fresh garlic
– 7 to 9 oz (200-250g) Raw Honey
Directions:
1. Start by separating the cloves of garlic, trim off the roots and outer skin. Make sure to remove the thin membrane under the outer skin.
2. Wash and pat the garlic dry, being careful not the break or damage the cloves.
3. Prepare a small packing jar by boiling in water to sterilize also called a water bath.
4. Pack the garlic cloves into the sterilized container. Pour over the honey. Allow the honey to set for a minute and top off, making sure to cover all the cloves.
5. Cover with lid and allow to sit in a cool dark place. Fermentation times very, after a couple of days one should see bubbles forming in the honey mixture. After a week, place in cold storage for better long term preservation. Enjoy!
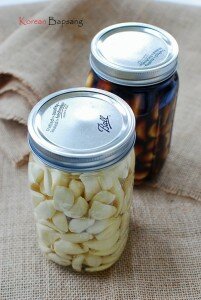
Garlic in Soy Sauce – Ninniku Shoyu-zuke
This recipe works well to rid the garlic of the strong odor. This recipe comes from Korea, but incorporates well into many dishes. Fresh garlic is the best. Use a local source if possible(Support your local farmer). Select well-proportioned bulbs as they are served in halves. Takes about two months before ready for use or when the odor diminishes.
Garlic steeped in Shuyo
What is Needed:
– 10 whole garlic bulbs
– 2 cups rice vinegar
– 1 ¼ c shoyu or favorite soy sauce
– 2 tbsp sugar or mirin to taste
Directions:
1. Choose round uniform bulbs that will form pretty plum blossoms when cut horizontally in half.
2. Peel the outer skin leaving only a single layer of skin to hold the garlic bulbs together. Trim away the stem for better packing.
3. Prepare a small packing jar by boiling in water to sterilize also called a water bath.
4. Pack the jar or container with the garlic bulbs. Add the rice vinegar and allow to stand, covered, in a dark space for two weeks.
5. After the two-week period, pour off 2/3rds of the vinegar (keep for other uses such as salad dressing).
Both the rice vinegar soaking and shoyu steeping
6. Mix the soy sauce and sugar until sugar dissolves. Warming the soy sauce will help combine the sugar.
7. Pour the mixture into the garlic/vinegar mixture and cover with lid. Date and label jar to know when the ferment is ready.
8. Just before serving, cut horizontally in half. Enjoy!
Enjoy these new uses for garlic throughout the winter time for stronger
immunity and health.
Happy Culturing…Live, Grow, Share Cultured Foods!
Now that you have made a fresh batch or purchased your koji rice, the next step is what to do with it. Many people use koji-kin rice to make saké, amasaké, or miso. However, what other ways are there to turn koji rice into something extraordinary?
Here are a few recipes to get you started…
~ Basic Amasaké Ferment ~
Used in Japan as a sweetener, beverage, or a simple alcoholic drink. Amasake is one of the best known cultured and fermented items from Japan. There are several recipes for amasake that have been used for hundreds of years. By a popular recipe, kōji is added to cooled whole grain rice causing enzymes to break down the carbohydrates into simpler unrefined sugars. As the mixture incubates, sweetness develops naturally.
By another popular recipe, sake kasu is simply mixed with water, but usually sugar is added. In this recipe, amasake becomes low-alcohol beverage if given time.
Amasake can be used as a dessert, snack, natural sweetening agent, baby food, added in salad dressing or smoothies. The traditional drink (prepared by combining amasake and water, heated to a simmer, and often topped with a pinch of finely grated ginger) was popular with street vendors, and it is still served at inns, tea houses, and at festivals. Many Shinto shrines in Japan provide
or sell it during the New Year!
Ready to Drink Amasake
What is needed…
3- cups cooked brown rice
1- cup light koji rice
If koji rice is needed…order here
Yield: 4 cups of fermented rice to use as a sweetener or 3 quarts Amasaké drink
Incubation Temperature: 120-140 F (50-60C)
Start by cooking the brown rice and allowing it to cool to at least 140 F (60C). Once cooled, stir in the koji rice and mix well. Place mixture into a glass or stainless steel container that will allow an inch of “headroom” to allow for expansion during the fermentation process. Cover container and incubate, stirring every couple of hours to prevent heat build up. The finished product can take as little as 6 hours with quality, fresh (not dried) koji-kin at optimum temperatures, after 6 hours start tasting the ferment to see if the cycle is complete.
When finished the ferment should thicken like porridge with a mild sweet taste. The sweetness will increase up to a point after which it will change and start to become sour. Once the taste is to your liking, place into a saucepan and bring to a boil. Reduce the heat and simmer for 3 to 5 min., stirring frequently. Boiling will stop the fermentation process keeping the amasaké sweet. For a smother amasaké consistency purée the mixture in a blender until smooth. Refrigerate any ferment not used right away. If not, the amasaké will become very sour.
Ways to Use Amasake Rice…
Amasaké Sweetener: Use ¼-cup ferment for each tbsp of sweetener called for in your favorite recipes and reducing the cooking liquid by 3 Tbsp. Baked goods will be rich and moist with a more subtle sweetness.
Amasaké Drink: For HOT amasaké, heat one part ferment and two parts very hot water. Add a dash of shoyu and a grating of fresh ginger root. Serve blended mix in heated mugs. For a cold drink, blend 1 part amasaké ferment and 2 part fruit, fruit juices, soy milk water and/or flavoring of your choice.
Doburoku: For simple “grog”, leave the amasaké ferment in the incubator for several days, stirring and tasting occasionally, until it develops a heady, alcoholic aroma. Blend as above, traditionally served in Japan as a thick and creamy drink or dilute to taste.
~ Mellow Pickled Cabbage ~
In Japan, pickled vegetables come with many meals, as a condiment or side dish. In Japan it is called ‘Kyabetsu no asazuke’. Unlike normal pickles this recipe is a fermented pickled delight. Like German style sauerkraut, pickled veggies are uncomplicated to make into a fermented snack or condiment! What is needed…
1 – pound organic cabbage of your choice or a mix of green and reds. Use American style or Napa/Chinese styles
2 – Tbsp non-iodized salt (Kosher or sea salt)
¼-cup koji rice If koji malted rice is needed…order here
¼-cup warm water
½ tsp honey or other sweetener
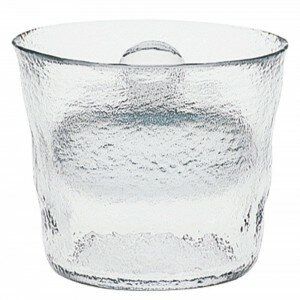
A Japanese tsukemono pickle press
Start by removing the center core and shred the cabbage coarsely. Mix well with the salt and pack into a glass bowl. Put a small enough plate to fit inside the bowl and weight it down with water filled glass jar or non-metal container.
Refrigerate for 3 days.
After 3 days, draw off the liquid from the cabbage but do not rinse.
TIP: Save the liquid brine for other uses. Dissolve the honey/sweetener in the warm water and add the koji rice. Set aside until the koji has dissolved the liquid and softened.
Next, mix the soaked koji and cabbage, mixing well. Pack contents into a straight-sided container, Add a plate and weight to keep everything under the liquid. Submerging the cabbage keeps the mixture from contamination with unwanted bacteria. Allow 4 to 5 days for the flavor to develop then refrigerate. Use within a week or two.
For those who do not wish to mess with jar and weights, a Japanese pickle fermenter is a great investment. Visit our shop to purchase the Japanese tsukemono pickle press. See photos for recommended styles.
~ Koji Pickled Sea & Root Vegetable Condiment ~
Here is another great recipe for using your fresh made koji-kin rice. It is a mix of seaweed and root vegetables with a lot of
umami flavor and health.
What is needed…
– ¼ cup of fresh light koji-kin rice Order koji malted rice here
– ½ oz dry kombu, wakamé, or sea palm. Should yield about ½ cup after soaking
– 1 to 1 ½ cups daikon, baby burdock root, or carrot. We enjoy a combination of all three. Try using any type of herbal roots, too.
– ¼ cup naturally fermented soy sauce, shoyu, or tamari
– ¼ cup mild vinegar, plain or flavored
– ¼ cup mirin or saké. Mirin imparts a sweet component to the mix and saké a dry alternative, extremely recommended!
Start by soaking the Kombu and/or other sea vegetable for 10 to 20 min. in just enough water to cover, soak until softened. Reserve ¼ cup of the soaking water and cut the sea vegetables into slivers or short ribbons. Next, scrub the root vegetables to remove any soil and cut them into thin slivers. Place the root vegetables, sea vegetables, and reserved soaking liquid into a saucepan and bring to a low boil. Add soy sauce and vinegar and return to a low boil. Cover and remove from heat. This step kills of any unwanted bacteria or wild yeast.
When the mixture has cooled to 110F (45C) (warm, but not too hot to touch) transfer to a glass bowl and stir in the koji-kin, mirin, and saké. Let the mixture mature for 4 hours at a cool to moderate room temperature, covered, stirring occasionally from time to time.
The pickled vegetables are ready to consume now or pack into quart mason jars and refrigerate the unused portion, which will continue to mellow and enhance the flavors even more over time. But first enjoy a bowl with your favorite grains!
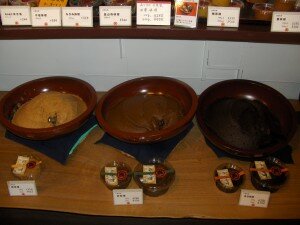
All Japanese Misos have the same basic recipe format; main difference is the quantities of the ingredients and incubation times. A dark or heavy miso will have less koji rice and more salt verses a sweet or mellow miso. Once the koji-kin/koji rice is completed, you can use it to make this Shiro miso. The fermentation time is quicker for this miso, 3 to 4 weeks, over a heavier miso, which can take 6 months to 3 years. The following instructions make two very classic types, one fast and one aged for 6 months:
Traditional Japanese Miso Production. Stones are used to hold down the koji/soybean mixture in wooden vats..
Making Shiro Miso
So let us get started! What you will need…
1-cup dry soybeans
3 ½ -cups light rice koji
2 ½ -tbsp sea salt
1-cup soybean cooking water
1 -tbsp un-pasteurized seed miso (optional or buy locally) Note: The seed miso aids in the faster culturing of the fresh koji rice
Any type of un-pasteurized miso paste will work. It contributes active beneficial cultures, which in turn assist in the maturing/aging process. If you make a good batch of miso, make sure to save some of the paste for the inculcation of new batches.
Yield: 4 ½ cups Fermentation Time: 3 to 4 weeks Aging Temperature: 77F (25C)
Shiro Miso Directions:
Cooking the Soybeans…
Start by soaking the soybeans overnight or for 8 to 12 hours in 4 cups of water.
After soaking, drain the soybeans and bring to boil in fresh water. Boil until the soybeans can easily crush between your fingers. Add additional water as needed. Time for cooking is around 4 to 5 hours, or 30 minutes in a pressure cooker at 15 pounds.
Mixing the Miso and Ingredients…
Drain the soybeans, reserving enough cooking liquid. Transfer the soybeans to a mixing bowl and mash thoroughly. Add the reserved cooking liquid and salt over the beans, mix. Allow the soybeans to cool below 140F (60C), before adding the koji rice and seed miso. If the soybeans are too hot, the heat could kill the
koji-rice mold culture. Mix again.
Packing the Miso Crock or Jar…
Now that the ingredients are mixed, it is time to pack the miso mixture into your jars. This recipe will pack a 1½-quart jar. Sterilizing the crock or jar is recommended to help prevent contamination. Sterilize a dry crock or jar by heating it upside down, in the oven at 300 F for 30 minutes. Allow to cool before moving. You can use a beer sterilizer, too.
Pack the mixture into straight-sided jar or fermenting crock. Expel any air bubbles trapped in the mixture (a chopstick works well for this). Flatten the surface and sprinkle enough salt to cover the miso mixture making sure to cover the edges. Cover this with clean plastic wrap, placing it directly on the salted mixture and up the sides. Place a weighted lid or bag over the plastic wrap. Make sure the weights are pushing down on the mixture. Lastly, cover the top with a breathable cloth or paper to keep out dust and contamination. You can vary the recipe a bit if desired,
until it is to your liking.
Letting the Miso Culture…
This part of the process involves allowing the packed koji rice miso to ago. For Shiro miso, the period is 3 to 4 weeks. Once minimum ago is reached, take a sample to taste. However, try to save some to allow further aging to compare taste. Smooth the surface once again adding a bit of salt to cover.
Make sure to label each batch with information such as type, date packed, recipe used, date completed, etc. Keeping good records will allow the next batch to taste the same as previous batches or you can try new variations to your liking.
Different Types of Japanese Miso
Shinshu Miso – Light Yellow Miso
Here is another classic miso recipe using koji rice and soybeans. You may experiment using other types of grains like wheat, barley or other substitutes for the soybeans. Unlike the quick fermentation of Shiro miso (3 to 4 weeks), Shinshu miso takes 6 months to a year time frame. Miso has a great earthy flavor and umami taste sensation!
So let us get started! What you will need…
2-cup dry soybeans
2 ½ -cups light rice koji
½ -cup sea salt
1-cup soybean cooking water
1 -tbsp un-pasteurized seed miso (optional or buy locally) Note: The seed miso aids in the faster culturing of the fresh koji rice
Any type of un-pasteurized miso paste will work. It contributes active beneficial cultures, which in turn assist in the maturing/aging process. If you make a good batch of miso, make sure to save some of the paste for the inculcation of new batches.
Yield: 6 ½ cups Fermentation Time: 6 to 12 months Aging Temperature: 77F (25C)
Shinshu Miso Directions:
Cooking the Soybeans…
Start by soaking the soybeans overnight or for 8 to 12 hours in 4 cups of water.
After soaking, drain the soybeans and bring to boil in fresh water. Boil until the soybeans can easily crush between your fingers. Add additional water as needed. Time for cooking is around 4 to 5 hours, or 30 minutes in a pressure cooker at 15 pounds.
Mixing the Miso and Ingredients…
Drain the soybeans, reserving enough cooking liquid. Transfer the soybeans to a mixing bowl and mash thoroughly. Add the reserved cooking liquid and salt over the beans, mix. Allow the soybeans to cool below 140F (60C), before adding the koji rice and seed miso. If the soybeans are too hot, the heat could kill the
koji-rice mold culture. Mix again.
Packing the Miso Crock or Jar…
Now that the ingredients are mixed, it is time to pack the miso mixture into your jars. This recipe will pack a 1½-quart jar. Sterilizing the crock or jar is recommended to help prevent contamination. Sterilize a dry crock or jar by heating it upside down, in the oven at 300 F for 30 minutes. Allow to cool before moving. You can use a beer sterilizer, too.
Pack the mixture into straight-sided jar or fermenting crock. Expel any air bubbles trapped in the mixture (a chopstick works well for this). Flatten the surface and sprinkle enough salt to cover the miso mixture making sure to cover the edges. Cover this with clean plastic wrap, placing it directly on the salted mixture and up the sides. Place a weighted lid or bag over the plastic wrap. Make sure the weights are pushing down on the mixture. Lastly, cover the top with a breathable cloth or paper to keep out dust and contamination. You can vary the recipe a bit if desired,
until it is to your liking.
Letting the Miso Culture…
This part of the process involves allowing the packed koji rice miso to ago. For Shinshu miso, the period is 6 to 12 months. Once minimum incubation time occurs, take a sample to taste. However, try to save some to allow further aging to compare taste. Smooth the surface once again adding a bit of salt to cover.
Make sure to label each batch with information such as type, date packed, recipe used, date completed, etc. Keeping good records will allow the next batch to taste the same as previous
batches or you can try new variations.
White miso soup with scallions
Now that you miso is finished aging, your ready to use it in many recipes. We have several miso recipes at our main site and are always adding new recipes.
Making miso is a great way to add living cultures into your lifestyle…Happy Culturing!
If you need pre-made koji-rice or koji spores please visit our store for fresh spores and other miso making items.
Use for Amasaké, Saké, Light Misos, or Japanese Pickles
Making your own fresh koji rice is not complicated if you have the correct tools and utensils on hand. Some equipment listed will make the process easy for someone with culturing experience. Making koji rice may not be the best culture forsomeone
new to fermentation or culturing..
What is needed…
A large bowl or pot for soaking 6 cups (1420ml) of sushi style rice
A sieve or colander for draining the rice
Wooden (traditional) or metal spoon to stir the rice
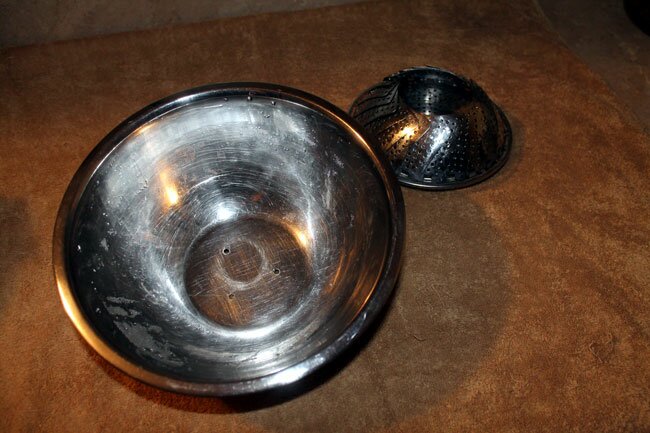
A large cooking pot for steaming the rice. Also, a modified bowl and a bamboo or metal vegetable steamer (See photos) Items for steaming sushi/polished rice
Pans or trays for inoculating the steamed rice
Heating mats/incubator with temperature control or a food dehydrator
Flour sacks material or cloth for holding the steaming rice. No cheesecloth.
Towels for covering the inoculating rice
Ingredients…
6 cup (1420gr) polished sushi rice (Plain white or brown rice will not produce the same results)
¼ cup (237gr) white rice flour or fresh grind from sushi rice
2 teaspoons (10ml) koji spore starter
Fermentation Time:
24 to 48 hrs
Incubation Temperature:
85 F (30 C)
How to Make Koji Rice…
Let’s Us Get Started…
Step1: The first step is to rinse and soak the sushi rice for 6 hours or more. Time this to end at the point you wish to start steaming the rice. Rinse the 6 cups of rice several times in fresh cold water until the water runs clear. This will take around 3 to 6 washes. Rinsing is very important to remove the starch from the rice kernels. If not removed, the finished steamed rice can stick together and makes complete inoculation difficult. After rinsing, cover the rice with 2” or 50mm of water and soak the rice in the refrigerator for 6 to 8 hours. We soak ours overnight. Note: If allowed to soak more than 10 hours will make the rice soft and may affect the inoculation process.
Step 2: After soaking, drain the rice in a colander to remove excess water. Removing the extra water between towels will also work. This step aids in keeping the cooked rice lump free. Once ‘dry’ place the rice in the pan setup. The setup includes the large cooking pot, a bamboo or metal steamer, and the modified bowl that will fit into the bottom of the pot. Add two inches of water to cover the bottom of the pot, but does not touch the steamer.
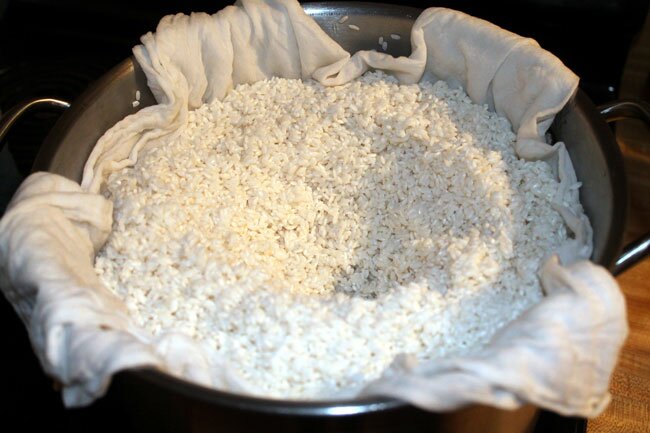
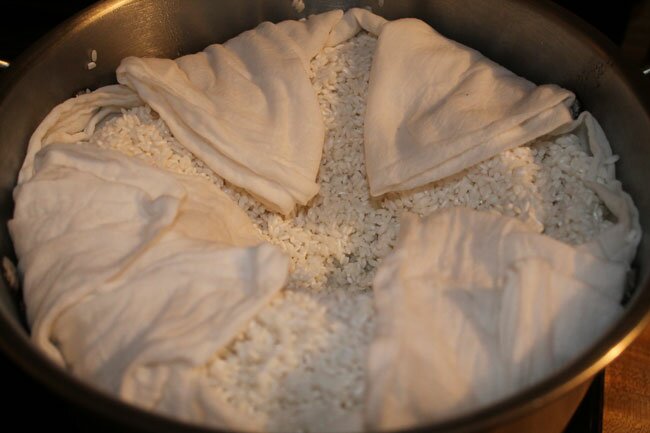
Line the steamer with the cloth and add the soaked rice. Press the rice out to the sides so the steam will go through the rice and not around it.
We find that making a hole in the center of the rice helps in correct steaming. Cover the pot and bring to a boil. When the steam rises through the rice (not just up the sides), time the steaming rice for 50 minutes. Watch to make sure the water does not boil dry. Add additional water by pulling rice bundle to one side and pouring the water down the side of the pot. About halfway through the process you may wish to turn the rice so the bottom will not over steam.
Note: Do not poor the water on the rice. CAUTION: Steam is very hot, so use utensils to avoid injury and safety.
Step 3: As the rice is steaming, prepare the koji spore starter for inoculation. Start by heating a dry skillet and lightly toast the rice flour to sanitize it. Not not burn the rice flour. Cover skillet and place in the refrigerator until cooled to room temperature. Once cooled, add the koji spores and mix well with clean spoon. Expel the air from the spore starter bag and reseal. Spores are very small and adding them to rice flour helps in even distribution of the spores. At this time, clean your work area, too. Wash and sanitize the trays for inoculation. Step 4: After steaming for 50 minutes, the steamed rice will look like a hot rubbery lump. You may check to see if the rice is ready by taking a small sample and tasting it. Properly cooked rice will have a rubbery feel and taste, the colour is somewhat clear. Rice should not be hard (under cooked) or soft like boiled rice (overcooked).
NOTE: Over cooking of the rice will not produce the desired finished product, as the spores cannot encapsulate each grain of rice. Most important is that the rice grains are whole and not broken by over cooking/steaming. The trick is to have enough moisture within the rice grains for the koji mold to form, yet not overcooked to the point that the rice will start decomposing.
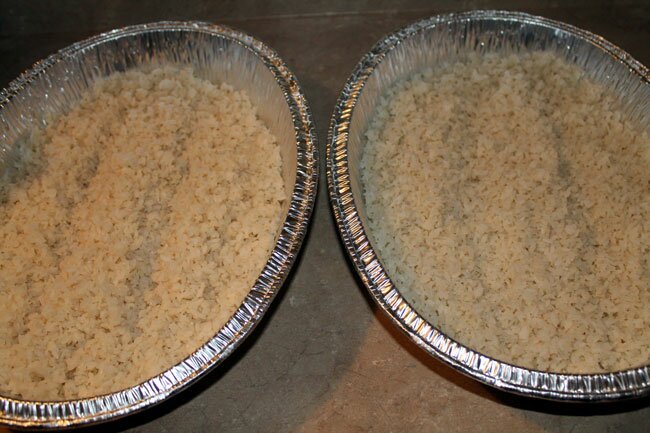
Remove the rice from the steamer and place in the incubation trays. Use a wooden spoon or rice paddle to brake up any clumps in the rice and create a uniform overall moistness and spread evenly in pan or tray. Cool to a temperature between 113 F (45 C) to 80 F (30 C).
Once cooled, the freshly steamed rice is ready for inoculation. Use the previously prepared spore and flour mixture for this purpose. Sprinkle half the starter-flour mixture over the cooled rice and mix thoroughly. Again, spread out the cooled rice, add the second half of the starter-flour mixture, and mix well. Now cover the trays/pans with the cover or use plastic wrap and place tray(s) in the incubator or on the heating mat. Sometimes an oven with the light on will produce the required heat. Incubate at a temperature of about 90 F (35 C). Note: It is important to get the koji mold actively working before unwanted bacteria can take hold. It is also fine to add extra spore starter, which will speed up the culturing time.
Step 5: Throughout the day, every 2 to 4 hours, check the internal temperature of the rice koji. Should hold temperature at 81-96F (27-35C). This temperature range is optimal for the development of enzymes necessary to make sweet cultured foods like amazaké and make sugars available for saké yeast. Temperatures higher than this will not ruin the koji for miso making, however, prolonged overheating will kill the koji mold and unwanted bacteria may take over. Once the temperature is checked, make necessary adjustments to the incubator.
After 24 to 48 hours at 85F (30C): Wash your hands and open the trays. There should be a faintly yeasty smell with a sweet fragrance of mushrooms. The grains should start to show white, fluffy signs of mold growing. If the koji rice is not fully cultured, mix the koji and allow incubating several more hours.
Note: As the koji rice ferments, it will produce heat from fermentation so decreasing the incubator temperature will be needed. To allow better heat distribution, run furrows one inch deep and two inches apart.
Replace the lids and place back into incubator or on heating mats. Make sure lids are tight to keep in moisture. If the rice becomes to dry fermentation will decrease or stop altogether. Adding a damp cloth over the trays can help if more moisture is needed. The internal temperature should not drop below 77 F(25 C) nor go above 104 F(40 C) for very long. If the rice is over heating, stir the koji rice mixture, level off and replace furrows. Cover and place into the incubator and adjust temperature.
Step 6: Keep checking the temperature about every 4 hours and stir koji rice at this point. Level off, replace furrows, and cover. Keep incubating the koji rice mixture, until rice grains are about 70 to 80% encapsulated. Check this by breaking some of the grains in half. By now, the rice should have a chalk-like whiteness and a sweet taste. Once mature, bring trays to room temperature and stir from time to time, until cooled.
Measure out the amount needed for immediate use. Once cooled, package the koji-kin into airtight containers and place in refrigerator or freezer. Dry the finished koji rice product for longest-term storage (Dry at a temperature below 85 deg F).
Fresh koji-kin rice will last about a month, dried and keep refrigerated 6 months, and dried and frozen will last up to a year.
See our koji recipe section for ideas on how to use your fresh koji in many traditional Japanese dishes.
Advanced Techniques
Some have asked on how to make koji spores themselves. If the finished koji-kin rice is left on it’s own, without drying, it will start to produce spores. Koji spores are dark green in color, as pictured below.
Tray of Koji-Kin Spores
Tray of Koji Close Up
Once the spores are produced, the natural culturing cycle is complete. The cultured rice is dried at a temperature of under 85 Deg F and then ground to a powder. The only problem arises from doing this yourself, is that of quality and purity controls. Because the spores are produced in a home environment vs. a lab the chance of contamination by other molds and/or bacteria is high. We do not produce any spores at our Culture Bank. We buy our tane-koji and kin-koji spores direct from Japan!


 These condiment sides are a great way to enhance a meal or dish. Very easy to make and uses only a few ingredients. The Japanese use many of these condiment sides every day and most contain minerals and micro-nutrients that normal

 Not really a condiment as it is used as a base, to build other flavors from. Used in many traditional Japanese dishes for that great added layer of flavor, called umami. Simple to make, but it adds a lot of flavor to a dish. Vegans and veggies can just make a seaweed and veggie dashi vs. using the bonito flakes.
 What is Tsukemono?


 When finished the ferment should thicken like porridge with a mild sweet taste. The sweetness will increase up to a point after which it will change and start to become sour. Once the taste is to your liking, place into a saucepan and bring to a boil. Reduce the heat and simmer for 3 to 5 min., stirring frequently. Boiling will stop the fermentation process keeping the amasaké sweet. For a smother amasaké consistency purée the mixture in a blender until smooth. Refrigerate any ferment not used right away. If not, the amasaké will become very sour.
 Amasaké Sweetener: Use ¼-cup ferment for each tbsp of sweetener called for in your favorite recipes and reducing the cooking liquid by 3 Tbsp. Baked goods will be rich and moist with a more subtle sweetness.
 Amasaké Drink: For HOT amasaké, heat one part ferment and two parts very hot water. Add a dash of shoyu and a grating of fresh ginger root. Serve blended mix in heated mugs. For a cold drink, blend 1 part amasaké ferment and 2 part fruit, fruit juices, soy milk water and/or flavoring of your choice.
 Doburoku: For simple “grog”, leave the amasaké ferment in the incubator for several days, stirring and tasting occasionally, until it develops a heady, alcoholic aroma. Blend as above, traditionally served in Japan as a thick and creamy drink or dilute to taste.


 Rinsing is very important to remove the starch from the rice kernels. If not removed, the finished steamed rice can stick together and makes complete inoculation difficult.
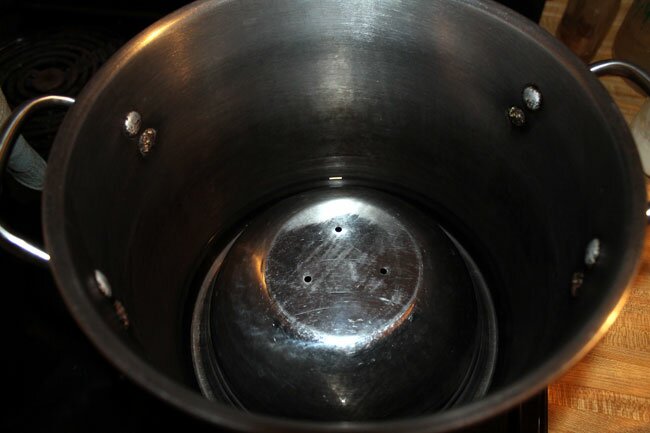


 NOTE: Over cooking of the rice will not produce the desired finished product, as the spores cannot encapsulate each grain of rice. Most important is that the rice grains are whole and not broken by over cooking/steaming. The trick is to have enough moisture within the rice grains for the koji mold to form, yet not overcooked to the point that the rice will start decomposing.